HowTo: How to share and unshare licenses

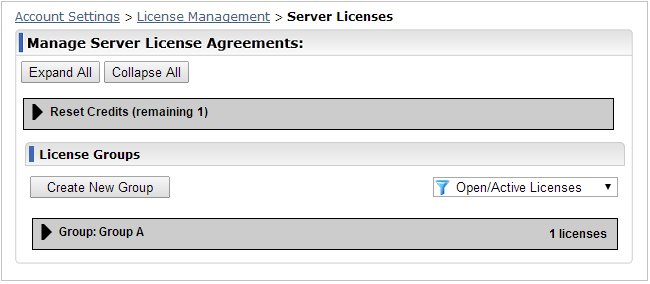
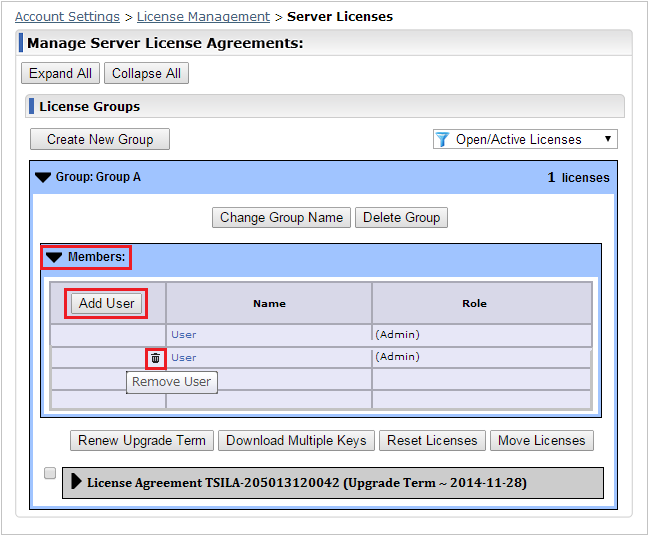
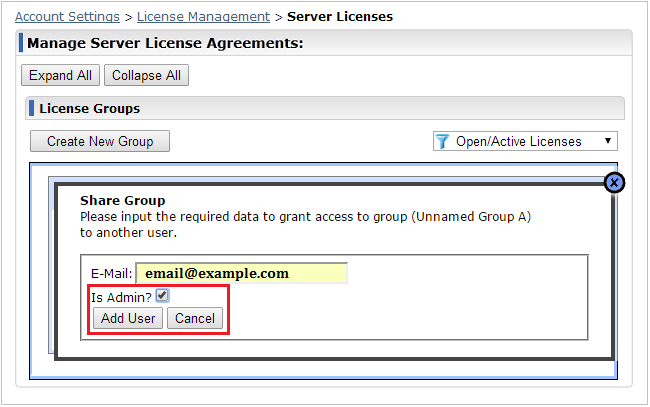
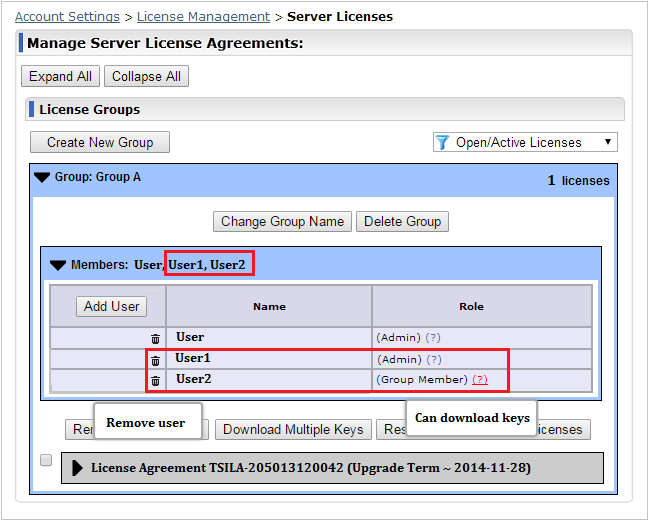
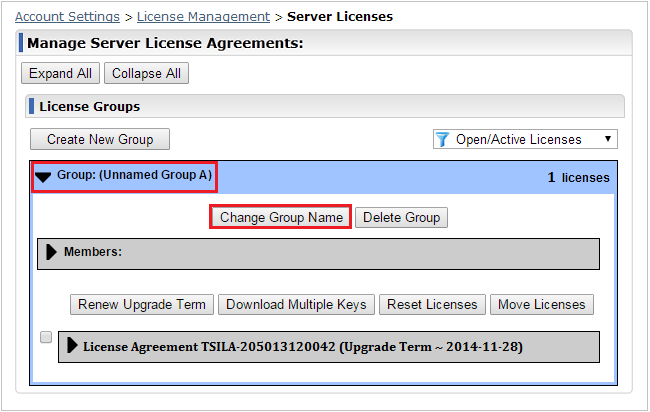
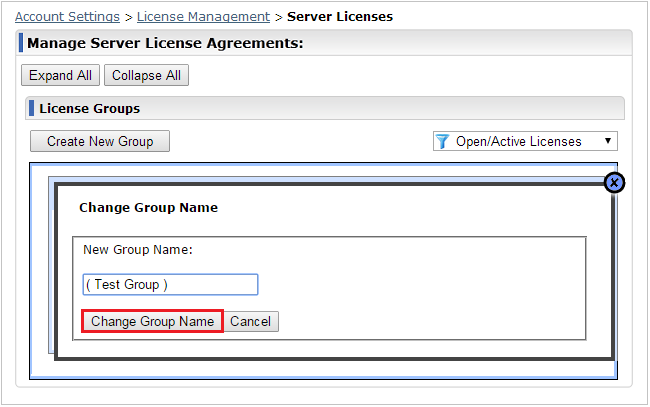
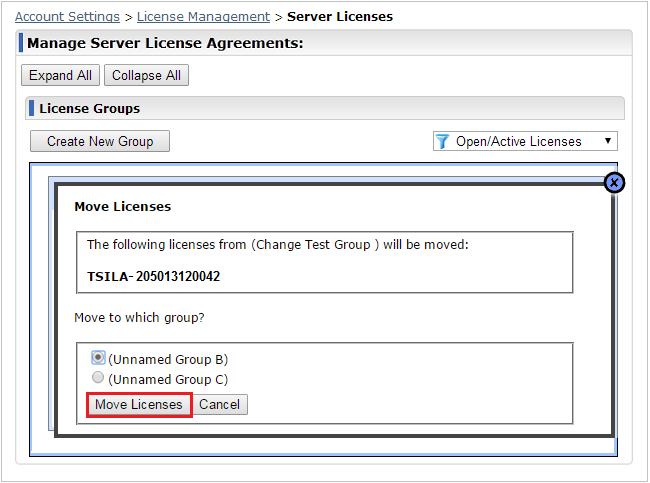
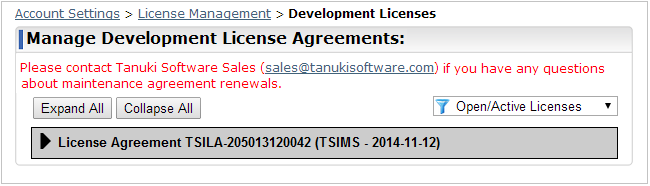
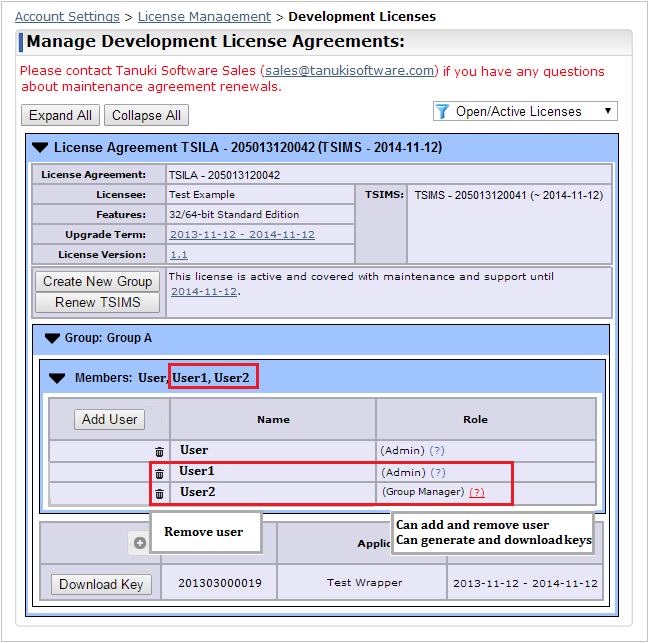
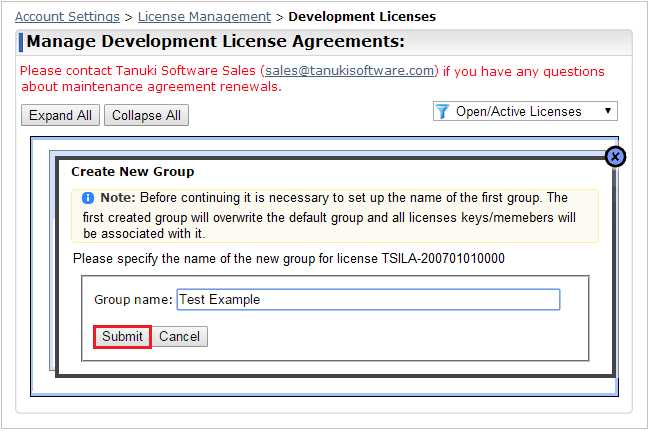
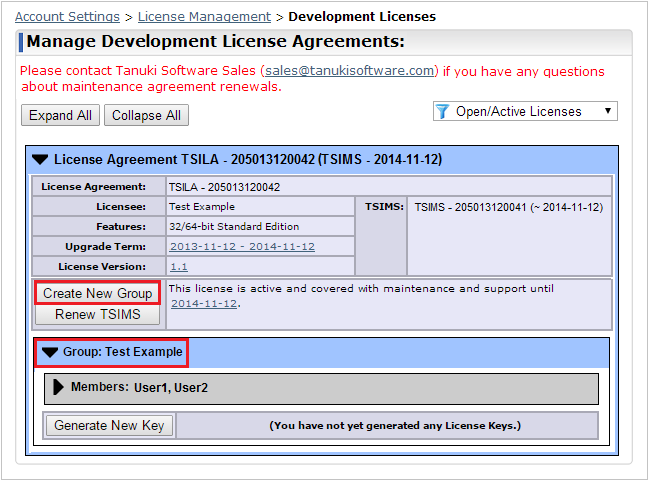
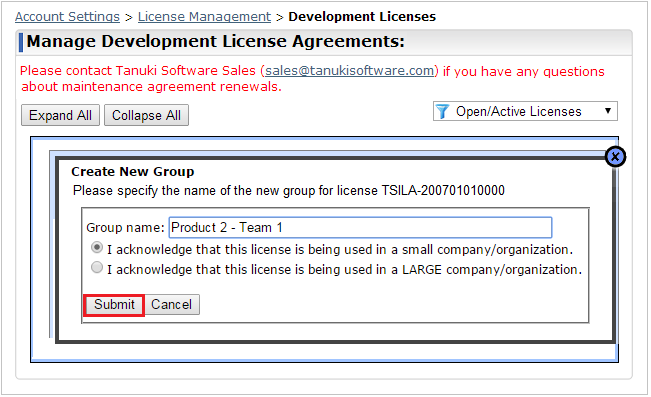
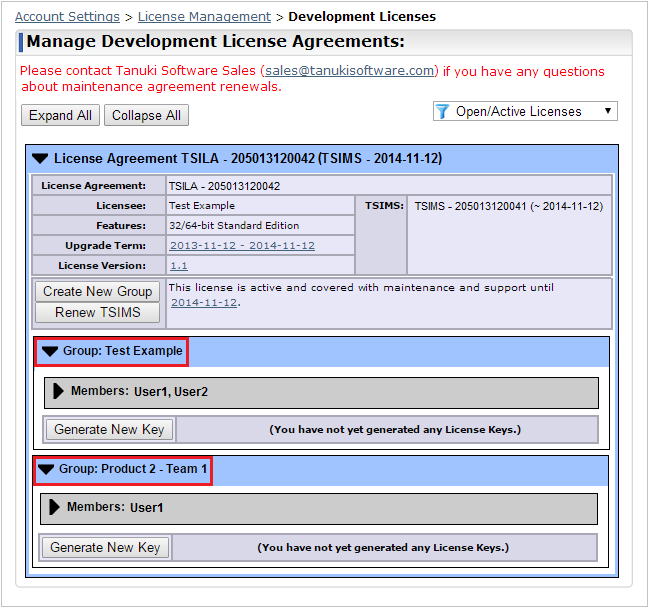
This section will help you to share and unshare your license and license groups with your teammates. When a license is assigned to your account only administrators can generate keys and grant access to other team members.

Server Licenses can be organized into license groups and sharing will happen at the group level.

Development licenses can contain groups of keys (please read the Development License Agreement for restrictions) and those groups are shared at the license level.

Manage your Server Licenses

On the Java Service Wrapper site, at the top of the page click on the Login button and insert your email address and password. You should go to the Manage Server License Agreements page.

Select the License you want to share/unshare

In order to share a license, you need the email address of a team member who has been already registered as a Java Service Wrapper user. Open the Members section and continue by clicking on the Add User button to share a license.

Submit the e-mail address of the new user

A window similar to the image below will be displayed. Please input the e-mail address of the user. You can also choose if you want the new user to be an administrator. Check the box and click on Add user button.

Shared and Unshared

After submitting your request, the page will be refreshed and the changes displayed. If you want to unshare/remove a user, click on the trash bin icon. If you want to know the Role for each user, hover over the question mark to learn more.

Create Server License Groups

When you first purchase a Server License or request a Free Trial Server License, by default a group is created and assigned to it. The name of the group will be Group:(Unnamed)Group A. If you would like to change the name, please click on the Change Group Name button.

You should now see something like the following image. Provide the name you want to use and go to the Change Group Name button. The page will refresh automatically, with the changes saved as well.

If you wish to change the name again, please do the same procedure. You can also create more Groups and move your license. After creating the new group(s), select the license(s) you want to move and use the Move Licenses button. A window will pop up. Select the group to where you want to move the license and finally click Move Licenses. The page will refresh automatically. Go to the selected group and you will see your license(s).

Manage your Development License

In the Login page, enter your email address and password. Then, go to the Manage Development License page. If you cannot see the license details, please click on the Expand All button and the "Members" section will be displayed.

Select the License you wish to share

In order to proceed sharing a license, you need the email address of a team member who has been already registered as a Java Service Wrapper user. Open the Members section and continue by pressing the Add User button to share a license.

Provide and Submit the email address of the new user

A window similar to the image below will be displayed. Please insert the email address. You can choose different roles from administrator, group manager or group member. Check a single option and click the Submit button.

Shared and Unshared

After submitting your request, the page will be refreshed and the changes displayed. If you wish to unshare/remove a user, click on the trash bin icon. If you want to know the Role for each user, hover over the question mark to learn more.

Create Groups

When you first purchase a Development License, by default a group is created. In order to generate a key, you will be asked to set up the name of the first group. A message similar to the following will be displayed. Please provide a group name and Submit.

The page will refresh automatically and you see the changes reflected. If you want to create more groups, you can do it by using the Create New Group button.

A message like the following is displayed. Provide the name you want for the New Group. Please select the best choice and Submit.

The page will refresh automatically and you will see a screen similar to the following image. You will now have 2 groups, which can be used to organize your products and development teams as you like.